
在以太坊区块链上开发智能合约,通过实现去中心化、自动化的交易,彻底改变了各行各业。Solidity、以太坊和CoinGecko API 的结合,创造了一种高效地与加密货币价格数据交互的方式。在本指南中,我们将介绍如何设置您的环境、编写和部署 Solidity 智能合约、集成 CoinGecko API,以及如何以安全、编程的方式为您的合约获取以太坊价格数据。

先决条件
在开始之前,请确保已安装以下软件:
Node.js 和 npm 作为我们的开发环境:确保您的计算机上已安装 Node.js 和 npm。Node.js 是基于 Chrome V8 JavaScript 引擎构建的 JavaScript 运行时,npm 是 Node.js 的软件包管理器,您将使用它来管理项目的依赖项。
CoinGecko API 用于加密货币价格和市场数据:我们将使用 CoinGecko API 获取加密货币的市场数据。免费的演示计划足以满足我们的需求,其速率限制为每分钟 30 次调用,每月调用次数上限为 10,000 次。
Truffle 框架:提供一套用于以太坊开发的工具,包括编译、部署和管理智能合约。通过 npm 安装:
npm install -g truffleGanache CLI:支持测试的本地以太坊区块链。安装方式:
npm install -g ganache-cliInfura 账户:连接以太坊网络的必需账户。请在Infura.io上创建账户,并获取 API 密钥。
设置开发环境
1.安装所需的软件包
我们将使用多个库,包括用于区块链交互的 Web3.js、用于设置 API 服务器的 Express 以及用于向 CoinGecko API 发出 HTTP 请求的 Axios。使用以下命令安装这些依赖项:
npm install web3 express axios dotenv
2. 初始化 Truffle 项目
创建一个新的 Truffle 项目来存放您的智能合约:
mkdir eth-coingecko-project
cd eth-coingecko-project
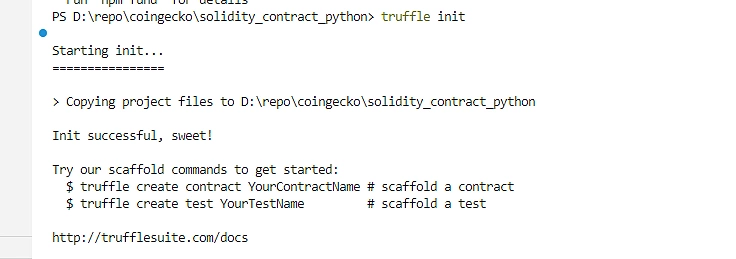
truffle init
3. 配置 Truffle 进行部署
要使用 Truffle 部署智能合约,您需要配置truffle-config.js目标网络和编译器版本。此文件包含用于在本地(例如,部署到 Ganache)和远程网络(例如,使用 Infura 连接到以太坊主网或测试网)部署合约的网络设置和编译器选项。
编辑该truffle-config.js文件以连接到本地 Ganache 网络和 Infura 端点进行部署。按如下方式配置网络选项:
| const HDWalletProvider = require("@truffle/hdwallet-provider"); | |
| const infuraKey = "YOUR_INFURA_KEY"; | |
| const mnemonic = "your 12-word mnemonic"; | |
| module.exports = { | |
| networks: { | |
| rinkeby: { | |
| provider: () => new HDWalletProvider(mnemonic, `https://rinkeby.infura.io/v3/${infuraKey}`), | |
| network_id: 4, // Rinkeby ID | |
| gas: 5500000, | |
| }, | |
| }, | |
| compilers: { | |
| solc: { | |
| version: "0.8.0" | |
| } | |
| } | |
| }; | |
| module.exports = { | |
| networks: { | |
| development: { | |
| host: "127.0.0.1", // Localhost (default: none) | |
| port: 8545, // Standard Ethereum port (default: none) | |
| network_id: "*", // Any network (default: none) | |
| }, | |
| }, | |
| compilers: { | |
| solc: { | |
| version: "0.8.0", // Fetch exact version from solc-bin (default: truffle's version) | |
| }, | |
| }, | |
| }; |
守则解释
网络配置:
host: " 127.0.0.1 ":指定本地区块链实例的 IP 地址。对于 Ganache,通常为 127.0.0.1 (localhost)。
port: 8545:指定 Ganache 监听传入连接的端口。默认情况下,Ganache CLI 在端口 8545 上运行。
network_id:“*”:允许 Truffle 连接到任何网络 ID。这很有用,因为 Ganache 每次启动时都会生成一个唯一的网络 ID,而这个通配符可以确保与它生成的任何 ID 兼容。
在 Truffle 配置(truffle-config.js)中,Infura 和助记符用于将合约安全地部署到公共以太坊网络(如 Rinkeby 或 Mainnet),而无需自己运行完整的以太坊节点。
开发:开发网络部分用于在 Ganache 上本地部署和测试合约。
编译器配置:
版本:“0.8.0”:指定要使用的 Solidity 编译器版本。设置精确的版本可确保与合约中特定的语言特性和语法兼容。使用“0.8.0”将从 solc-bin 仓库获取此版本。
solc:此部分配置 Solidity 编译器设置。
为什么要配置开发和编译?
配置这些设置有助于确保:
本地部署:Truffle 知道将合约部署到像 Ganache 这样的本地区块链,从而无需使用真正的 Ether 即可更轻松地进行测试和调试。
受控 Solidity 版本:使用特定的 Solidity 版本可避免不同编译器版本之间可能存在的语言特性和编译器优化问题。
编写和部署 Solidity 智能合约
1.创建Solidity合约文件
在合约目录中,为基于 ERC20 的代币合约创建 MyToken.sol。
MyToken.sol Solidity 文件定义了一个基本的 ERC20 代币智能合约,其中包含转账和查询余额的基本功能。这个简单的代币适合用于学习和测试 ERC20 代币在以太坊区块链上的运作方式。让我们分解一下这段代码的各个部分:
2. 编写智能合约代码
这是一个基本的 ERC20 代币,带有 balanceOf 和 transfer 函数,用于查询用户余额:
| // SPDX-License-Identifier: MIT | |
| pragma Solidity ^0.8.0; | |
| contract MyToken { | |
| string public name = "MyToken"; | |
| string public symbol = "MTK"; | |
| uint8 public decimals = 18; | |
| uint256 public totalSupply = 1000000 * 10 ** uint256(decimals); | |
| mapping(address => uint256) public balanceOf; | |
| constructor() { | |
| balanceOf[msg.sender] = totalSupply; | |
| } | |
| function transfer(address _to, uint256 _value) public returns (bool success) { | |
| require(balanceOf[msg.sender] >= _value); | |
| balanceOf[msg.sender] -= _value; | |
| balanceOf[_to] += _value; | |
| return true; | |
| } | |
| } |
3. 编译智能合约
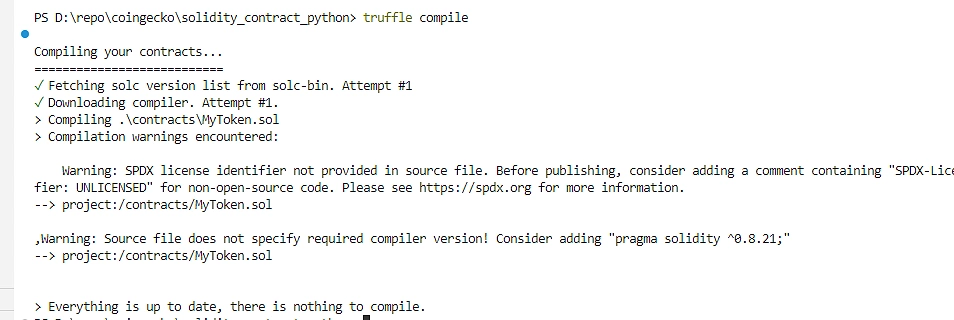
使用以下命令编译合约:
truffle compile
4. 使用 Truffle 部署智能合约
在 migrations/2_deploy_contracts.js 中添加迁移脚本:
const MyToken = artifacts.require("MyToken");
module.exports = function (deployer) {
deployer.deploy(MyToken, 1000000); // Deploy with 1 million initial supply
};
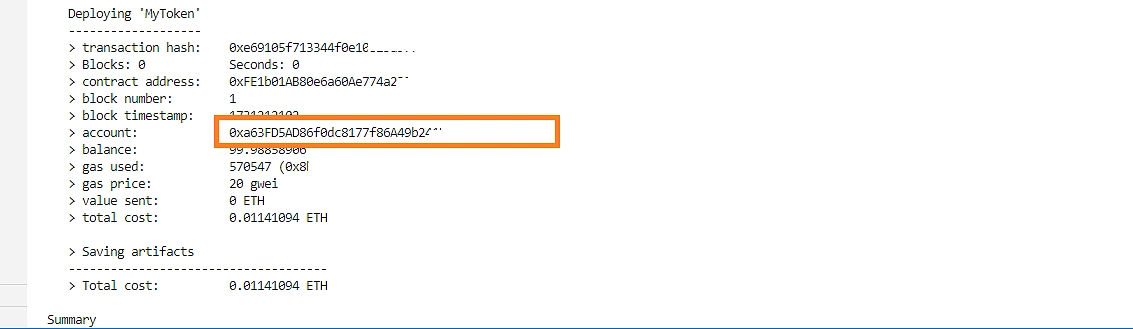
本地部署:
truffle migrate --network development
运行 Ganache CLI
要启动 Ganache CLI,请打开一个新的终端或命令提示符并运行以下命令:
ganache-cli
这将默认在 http://127.0.0.1:8545 上启动本地以太坊区块链。您将看到生成的账户列表及其地址和私钥,可用于开发和测试目的。
示例输出
当您运行 ganache-cli 时,您应该看到类似如下的输出:

完整的 Node.js 程序
以下是集成 Web3.js、 CoinGecko API和 Express 服务器的完整 Node.js 程序,用于与以太坊区块链交互、检索数据以及与智能合约交互:
| const https = require('https'); | |
| const Web3 = require('web3'); | |
| const axios = require('axios'); | |
| require('dotenv').config(); | |
| const fs = require('fs'); | |
| const express = require('express'); | |
| // Load environment variables | |
| const COINGECKO_API_KEY = process.env.COINGECKO_API_KEY; | |
| // Web3 setup using Ganache | |
| const ganacheUrl = 'http://127.0.0.1:8545'; // Default Ganache CLI URL | |
| const web3 = new Web3(new Web3.providers.HttpProvider(ganacheUrl)); | |
| async function getEthBalance(userAddress) { | |
| return new Promise((resolve, reject) => { | |
| web3.eth.getBalance(userAddress, (err, balance) => { | |
| if (err) { | |
| reject(err); | |
| } else { | |
| resolve(web3.utils.fromWei(balance, 'ether')); | |
| } | |
| }); | |
| }); | |
| } | |
| // Load ERC20 ABI and your Smart Contract ABI | |
| const erc20Abi = [ | |
| { | |
| "constant": true, | |
| "inputs": [ | |
| { | |
| "name": "_owner", | |
| "type": "address" | |
| } | |
| ], | |
| "name": "balanceOf", | |
| "outputs": [ | |
| { | |
| "name": "balance", | |
| "type": "uint256" | |
| } | |
| ], | |
| "type": "function" | |
| }, | |
| { | |
| "constant": false, | |
| "inputs": [ | |
| { | |
| "name": "_to", | |
| "type": "address" | |
| }, | |
| { | |
| "name": "_value", | |
| "type": "uint256" | |
| } | |
| ], | |
| "name": "transfer", | |
| "outputs": [ | |
| { | |
| "name": "success", | |
| "type": "bool" | |
| } | |
| ], | |
| "type": "function" | |
| } | |
| ]; | |
| const myTokenAbi = JSON.parse(fs.readFileSync('./MyToken_abi.json')); | |
| const myTokenAddress = '0x33e4D0517Ff8C174b90FEd77E413fE1aFC6207a8'; // Replace with your actual token contract address | |
| const app = express(); | |
| app.use(express.json()); | |
| // Functions | |
| async function newAccount() { | |
| const account = web3.eth.accounts.create(); | |
| return { | |
| privateKey: account.privateKey, | |
| address: account.address, | |
| }; | |
| } | |
| async function getErc20Balance(contractAddress, userAddress) { | |
| const checksumAddress = web3.utils.toChecksumAddress(userAddress); | |
| console.log(`Checksum Address: ${checksumAddress}`); | |
| const contract = new web3.eth.Contract(erc20Abi, contractAddress); | |
| const balance = await contract.methods.balanceOf(checksumAddress).call(); | |
| return balance; | |
| } | |
| // Fetch market chart data from CoinGecko API | |
| async function getMarketChart(days) { | |
| const url = `https://api.coingecko.com/api/v3/coins/ethereum/market_chart?vs_currency=usd&days=${days}`; | |
| const response = await axios.get(url, { | |
| headers: { | |
| Authorization: `Bearer ${COINGECKO_API_KEY}`, | |
| } | |
| }); | |
| if (response.status === 200) { | |
| return response.data; | |
| } else { | |
| throw new Error('Failed to fetch market chart data from CoinGecko'); | |
| } | |
| } | |
| async function sendTransaction({ to, amount, privateKey }) { | |
| const account = web3.eth.accounts.privateKeyToAccount(privateKey); | |
| const nonce = await web3.eth.getTransactionCount(account.address); | |
| const tx = { | |
| to, | |
| value: web3.utils.toWei(amount, 'ether'), | |
| gas: 2000000, | |
| gasPrice: web3.utils.toWei('20', 'gwei'), // Adjust gas price as needed | |
| nonce, | |
| chainId: 1337 // Ganache's default chain ID | |
| }; | |
| const signedTx = await account.signTransaction(tx); | |
| const receipt = await web3.eth.sendSignedTransaction(signedTx.rawTransaction); | |
| return receipt.transactionHash; | |
| } | |
| async function interactWithSmartContract(userAddress) { | |
| const contract = new web3.eth.Contract(myTokenAbi, myTokenAddress); | |
| // Example interaction with the smart contract | |
| const result = await contract.methods.totalSupply().call({ from: userAddress }); // Replace totalSupply with actual method | |
| return result; | |
| } | |
| // Express routes | |
| app.get('/balance/:contract_address', async (req, res) => { | |
| try { | |
| const contractAddress = req.params.contract_address; | |
| const account = await newAccount(); | |
| const balance = await getErc20Balance(contractAddress, account.address); | |
| res.json({ balance }); | |
| } catch (error) { | |
| res.status(500).json({ error: error.message }); | |
| } | |
| }); | |
| app.get('/eth_balance/:user_address', async (req, res) => { | |
| try { | |
| const userAddress = req.params.user_address; | |
| const balance = await getEthBalance(userAddress); | |
| res.json({ balance }); | |
| } catch (error) { | |
| res.status(500).json({ error: error.message }); | |
| } | |
| }); | |
| app.get('/market_chart/:days', async (req, res) => { | |
| try { | |
| const { days } = req.params; | |
| const marketChart = await getMarketChart(days); | |
| res.json(marketChart); | |
| } catch (error) { | |
| res.status(500).json({ error: error.message }); | |
| } | |
| }); | |
| app.listen(3000, () => { | |
| console.log('Server is running on port 3000'); | |
| }); | |
| // Self-invoking function for initial actions | |
| (async () => { | |
| try { | |
| // Create a new account | |
| const account = await newAccount(); | |
| console.log('New Account:', account); | |
| // Get balance of an ERC20 token (example usage) | |
| const erc20Address = myTokenAddress; // Use your deployed token address | |
| const balance = await getErc20Balance(erc20Address, account.address); | |
| console.log('ERC20 Token Balance:', balance); | |
| // Get ETH balance | |
| const ethBalance = await getEthBalance(account.address); | |
| console.log('ETH Balance:', ethBalance); | |
| // Get market chart data | |
| const marketChart = await getMarketChart(30); // last 30 days | |
| console.log('Market Chart Data:', marketChart); | |
| // Interact with your smart contract | |
| const contractResult = await interactWithSmartContract(account.address); | |
| console.log('Smart Contract Result:', contractResult); | |
| } catch (error) { | |
| console.error('Error:', error); | |
| } | |
| })(); |
它使用 Web3.js 连接到本地 Ganache 区块链实例,以模拟区块链交易和账户操作。该程序定义了一些函数来创建新的以太坊账户、检查以太坊和 ERC20 代币余额以及与已部署的智能合约交互。它还从 CoinGecko 获取以太坊市场数据,允许用户获取历史价格数据。Express 服务器设置了几个 API 端点(例如 /balance、/eth_balance 和 /market_chart),允许用户检索 ERC20 余额、以太坊余额和市场图表数据。该程序在端口 3000 上运行,并准备通过这些 RESTful API 端点在本地测试智能合约交互。
将 CoinGecko API 与智能合约集成
1.设置CoinGecko API密钥
将您的 CoinGecko API 密钥添加到项目根目录中的 .env 文件中:
COINGECKO_API_KEY=your_coingecko_api_key
配置 dotenv 以在脚本中加载环境变量:
require('dotenv').config();
预期输出
要运行程序并查看输出,请在终端中输入以下命令:
node index.js
为了全面了解输出,请截取终端窗口的屏幕截图,显示这些消息和 API 响应的记录。
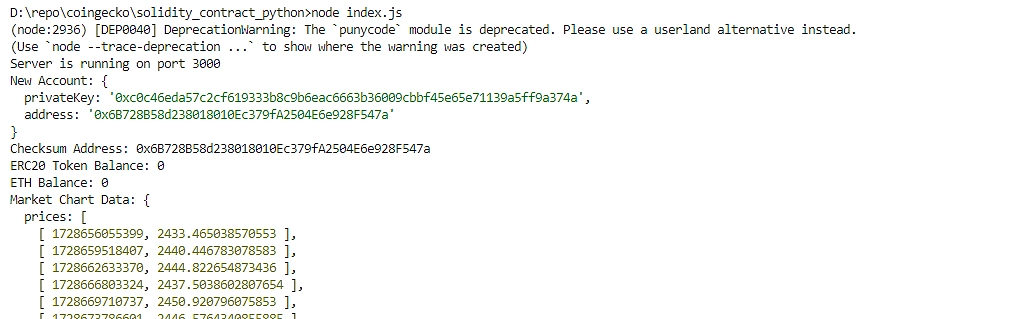
当你运行 node index.js 时,程序将:
创建新的以太坊账户:创建一个新的以太坊账户,并将其详细信息(地址和私钥)打印到控制台。
示例输出:
新账户:{ privateKey: '0x...', address: '0x...' }检索 ERC20 代币余额:获取已创建账户已部署的 ERC20 代币余额,并将其显示在控制台中。
示例输出:
ERC20 代币余额:1000000
获取 ETH 余额:检查并显示账户的 ETH 余额,并将其从 Wei 转换为 Ether。
示例输出:
ETH 余额:0.0
从 CoinGecko 获取市场数据:使用 CoinGecko 的 API,检索过去 30 天的以太坊价格数据,并以 JSON 格式显示。
示例输出:
市场图表数据:{prices: [...], market_caps: [...], total_volumes: [...] }与智能合约交互:调用智能合约的 totalSupply 函数(或其他指定函数)并输出结果。
示例输出:
智能合约结果:1000000
测试 API 端点
运行程序后,您可以测试 Express 服务器提供的端点。例如:
检查 ETH 余额:
http://localhost:3000/eth_balance/<user_address>检查 ERC20 代币余额:
http://localhost:3000/balance/<contract_address>获取市场图表数据:
http://localhost:3000/market_chart/30
常见问题故障排除
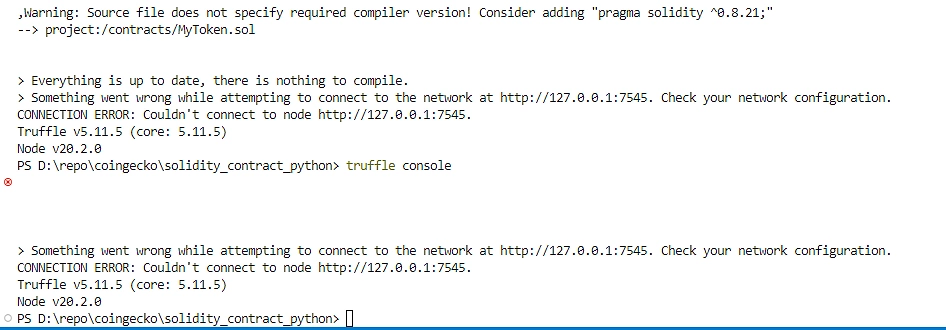
1. Truffle 连接错误
如果您遇到 truffle 连接问题,请确保您的 api 端点在 index.js 文件中正确配置并在 Truffle 配置中引用。
2. ABI 不匹配错误
确保 MyToken_abi.json 文件中的合约 ABI 与已部署合约的 ABI 相匹配。
3.增加超时设置
对于慢速连接或较大的数据调用,请增加 axios 中的超时设置:
axios.defaults.timeout = 5000; // Set to 5 seconds
结论
将以太坊智能合约与CoinGecko API集成,开发者能够利用实时加密货币数据增强区块链项目,从而打造更具活力、更有价值的用户体验。这种方案尤其适用于构建金融工具和去中心化应用程序,因为实时市场数据对于决策、投资组合跟踪或交易工具至关重要。借助此解决方案,您可以自动化数据检索、高效管理用户余额,并直接从后端与智能合约交互,从而为更复杂、数据驱动的去中心化应用程序铺平道路。
通过遵循这种方法,您还可以充分扩展您的应用程序,添加新功能,例如跟踪多种代币、实现高级交易流程或将智能合约部署到其他以太坊网络。对于那些希望利用可靠的真实数据探索区块链潜力的人来说,这种基础集成是一个灵活且可扩展的切入点。