我们将利用 Megafilter 端点构建一个 Web 应用程序,用于探索和筛选流动性池,以帮助及早识别有潜力的流动性池,同时确保它们值得信赖且健康。我们将使用 SvelteKit,因此建议(但非必需)熟悉 Svelte 或现代 JavaScript 框架。
与往常一样,我们会在文章末尾附上 GitHub 链接,让您快速入门。

如何使用 Megafilter API 端点
Megafilter API 返回流动性池数据的分页列表,这些数据由GeckoTerminal从多个网络和去中心化交易所 (DEX) 聚合而成——所有这些都可以通过单个端点访问。
由于结果已分页,因此以分页表的形式显示它们非常适合 Web 或应用集成。要浏览页面,只需调整请求 URL 中的 page 参数即可:
https://pro-api.coingecko.com/api/v3/onchain/pools/megafilter?page=1
该端点提供了多种数据滑动和切块的方法,允许您将多个过滤器和排序器参数附加到请求 URL。过滤依据:
网络(逗号分隔)
DEX(逗号分隔)
FDV
体积
交易数量
以及更多
以下是对 Polygon、BSC 和 Solana 网络上的池的请求示例,其 FDV 和最低交易量为 10,000 美元:
https://pro-api.coingecko.com/api/v3/onchain/pools/megafilter?page=1&networks=polygon_poly%2C%20bsc%2C%20sol&fdv_usd_min=10000&h24_volume_usd_min=10000
某些参数(例如网络)需要调用其他 CoinGecko API 端点来获取有效属性,因为端点通过 CoinGecko ID 进行搜索。
现在我们已经对端点的工作原理有了基本的了解,我们将使用一个实际的例子来对端点数据进行切分。
先决条件
CoinGecko Pro API 密钥
Node.js 和 npm(或 pnpm)
获取 CoinGecko API 密钥
要获取 CoinGecko API 密钥,请前往开发者面板,然后点击右上角的“+添加新密钥” 。
安装 Node.js 和 npm
通过打开新的控制台或终端窗口并输入适合您操作系统的相应命令来安装 node.js:
| winget install Schniz.fnm # Windows | |
| curl -o- https://fnm.vercel.app/install | bash # Linux / Mac | |
| fnm install 22 |
步骤 1.配置项目
满足要求后,让我们通过初始化 SvelteKit、添加组件库和安全地存储我们的 API 密钥来设置我们的项目。
初始化 Sveltekit
我们选择 Sveltekit 是因为它易于上手、代码简洁,更重要的是,借助正确的组件库,我们可以轻松地为 Megafilter 端点数据构建分页表。
首先,创建一个空目录并在终端/cmd 中运行以下命令:
npx sv create my-app
以下是我们将用于该项目的配置选项:
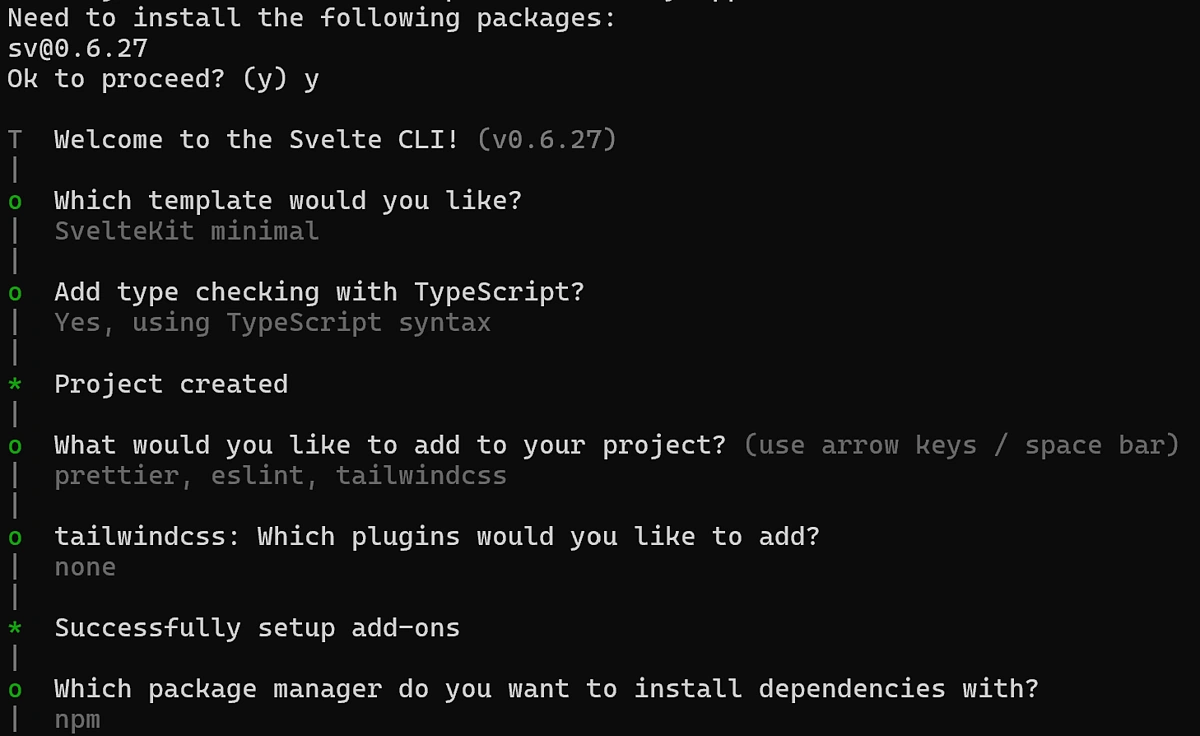
请注意,您至少需要包含TypeScript和tailwindcss才能遵循本指南。
安装 Flowbite(组件库)
组件库是一系列预先设计好样式、可自定义的元素,有助于快速构建美观的应用,同时节省创建一致设计的时间。Flowbite 是 Svelte 生态系统中一个成熟的库,但我们之所以选择它,是因为它能够轻松显示我们的 Megafilter 数据。
首先安装 Flowbite 和 Flowbite 图标库:
| npm i -D flowbite-svelte flowbite flowbite-svelte-icons |
现在,导航到src/app.css并使用以下设置替换文件的内容:
| @import 'tailwindcss'; | |
| @plugin '@tailwindcss/typography'; | |
| @plugin 'flowbite/plugin'; | |
| @custom-variant dark (&:where(.dark, .dark *)); | |
| @theme { | |
| --color-primary-50: #fff5f2; | |
| --color-primary-100: #fff1ee; | |
| --color-primary-200: #ffe4de; | |
| --color-primary-300: #ffd5cc; | |
| --color-primary-400: #ffbcad; | |
| --color-primary-500: #fe795d; | |
| --color-primary-600: #ef562f; | |
| --color-primary-700: #eb4f27; | |
| --color-primary-800: #cc4522; | |
| --color-primary-900: #a5371b; | |
| } | |
| @source "../node_modules/flowbite-svelte/dist"; |
这定义了我们主题的主要颜色,因此请随意选择您喜欢的任何其他颜色。
要确认安装,请运行npm run dev,您的应用程序应该可以在http://localhost:5173上访问。
存储 API 密钥
在项目根目录下创建一个名为.env的新文件,以安全地存储您的 CoinGecko API 密钥:
| CG_API_KEY="YOUR_API_KEY" |
步骤2.定义Megafilter类型
Megafilter 是一个复杂的端点,它接受多个参数,因此映射所有不同的过滤器可以让我们更好地了解请求应该是什么样子。请参阅 CoinGecko API 文档,详细了解所有Megafilter 端点参数。以下是如何映射这些参数的示例:
首先在src/lib/Types下创建一个名为Filter.ts的新文件。
| export type Filter = { | |
| page: string; | |
| networks?: string; | |
| dexes?: string; | |
| sort?: string; | |
| fdv_usd_min?: string; | |
| fdv_usd_max?: string; | |
| h24_volume_usd_min?: string; | |
| h24_volume_usd_max?: string; | |
| pool_created_hour_min?: string; | |
| pool_created_hour_max?: string; | |
| tx_count_min?: string; | |
| tx_count_max?: string; | |
| tx_count_duration?: string; | |
| buys_min?: string; | |
| buys_max?: string; | |
| buy_tax_percentage_max?: string; | |
| sells_min?: string; | |
| sells_max?: string; | |
| checks?: string; | |
| }; |
现在我们已经探索了进入Megafilter的数据,理解输出的形状同样重要。API返回一个包含多个嵌套对象的PoolData[]数组,因此我们可以按如下方式映射它们:
| type PriceChange = Record<'m5' | 'm15' | 'm30' | 'h1' | 'h6' | 'h24', number>; | |
| type TransactionData = { | |
| buys: number; | |
| sells: number; | |
| buyers: number; | |
| sellers: number; | |
| }; | |
| type Transactions = Record<keyof PriceChange, TransactionData>; | |
| type VolumeUSD = Record<keyof PriceChange, number>; | |
| type TokenData = { | |
| id: string; | |
| type: string; | |
| }; | |
| type Relationship = { | |
| data: TokenData; | |
| }; | |
| type Relationships = { | |
| base_token: Relationship; | |
| quote_token: Relationship; | |
| network: Relationship & { data: { id: string; type: 'network' } }; | |
| dex: Relationship & { data: { id: string; type: 'dex' } }; | |
| }; | |
| type Attributes = { | |
| base_token_price_usd: number; | |
| base_token_price_native_currency: number; | |
| quote_token_price_usd: number; | |
| quote_token_price_native_currency: number; | |
| base_token_price_quote_token: number; | |
| quote_token_price_base_token: number; | |
| address: string; | |
| name: string; | |
| pool_created_at: string; | |
| fdv_usd: number; | |
| market_cap_usd: number; | |
| price_change_percentage: PriceChange; | |
| transactions: Transactions; | |
| volume_usd: VolumeUSD; | |
| reserve_in_usd: number; | |
| }; | |
| export type PoolData = { | |
| id: string; | |
| type: string; | |
| attributes: Attributes; | |
| relationships: Relationships; | |
| }; |
您可以在名为PoolData.ts 的文件中定义它。请注意,尽管它是一个分页端点,但它不会返回任何常见的分页属性,例如 recordCount、itemsPerPage 和 pageNumber。
根据您的具体实现,您可能需要为某些过滤选项创建特定类型。例如,这里我们创建了一个名为Checks.ts的新文件,并为&checks=参数定义了一个类型 。该类型最多可以包含四个以逗号分隔的参数。
| export type Checks = "no_honeypot" | "good_gt_score" | "on_coingecko" |
下一个类型对于 Megafilter 来说并非必需,但大多数情况下,你需要将过滤器的值(例如 no_honeypot)映射到面向用户的标签(例如 No Honeypot)。在名为Sorters.ts的新文件中,定义以下类型:
| export type Sorter = { name: string; value: string | number }[]; |
步骤 3. 设置 Megafilter 请求
向 Megafilter 端点发出请求的一个好方法是定义一个 CoinGecko 类,以便在整个应用程序中重复使用。在src/lib/Providers 下,我们可以 创建一个名为CGProdiver.ts的新文件。
| import type { Filter } from '$lib/Types/Filter'; | |
| import type { PoolData } from '$lib/Types/PoolData'; | |
| import { buildQueryString } from '$lib/Utils/QueryParser'; | |
| class CoinGecko { | |
| private root: string; | |
| private headers: Record<string, string>; | |
| constructor(apiKey: string) { | |
| this.root = 'https://pro-api.coingecko.com/api/v3'; | |
| this.headers = { | |
| accept: 'application/json', | |
| 'x-cg-pro-api-key': apiKey | |
| }; | |
| } | |
| async getFilteredPools(filter: Filter): Promise<PoolData[]> { | |
| const queryString = buildQueryString(filter); | |
| const requestUrl = `${this.root}/onchain/pools/megafilter?${queryString}`; | |
| console.log(requestUrl); | |
| const response = await fetch(requestUrl, { headers: this.headers }); | |
| if (!response.ok) { | |
| console.error(`Error fetching data: ${response.statusText}`); | |
| return []; | |
| } | |
| const result = await response.json(); | |
| return result.data as PoolData[]; | |
| } | |
| } | |
| export default CoinGecko; |
由于 Megafilter 端点需要查询字符串作为参数,我们需要确保每次调用时都提供该字符串。一种方法是构建一个简单的辅助函数来解析参数并将其转换为查询字符串。例如,在 src/lib/Utils/QueryParser.ts下 ,将输出附加到端点 URL:
| import type { Filter } from '$lib/Types/Filter'; | |
| export function buildQueryString(filter: Filter): string { | |
| const queryParams = new URLSearchParams(); | |
| Object.entries(filter).forEach(([key, value]) => { | |
| if (value !== undefined && value !== '') { | |
| queryParams.append(key, value.toString()); | |
| } | |
| }); | |
| return queryParams.toString(); | |
| } |
步骤 4. 定义筛选选项
一些过滤选项(例如网络过滤器)需要从其他 CoinGecko 端点获取数据以检索过滤选项列表,然后将它们传递给 Megafilter。
一种方法是使用 Postman 向相关端点发出请求并存储响应。
在src/lib/Data下创建一个名为AvailabilityNetworks.ts的新文件,并将来自Supported Networks List的响应存储为 Sorter 类型:
| import type { Sorter } from '$lib/Types/Sorters'; | |
| export const networks: Sorter = [ | |
| { name: 'Ethereum', value: 'eth' }, | |
| { name: 'BNB Chain', value: 'bsc' }, | |
| { name: 'Polygon POS', value: 'polygon_pos' }, | |
| { name: 'Avalanche', value: 'avax' }, | |
| { name: 'Moonriver', value: 'movr' }, | |
| { name: 'Cronos', value: 'cro' }, | |
| { name: 'Harmony', value: 'one' } | |
| // Add more networks | |
| ] |
请注意,我们修改了响应以使其看起来更加用户友好。
接下来,我们需要一种简单的方法将过滤器值发送到各个 Megafilter 参数。我们可以使用简单的输入字段,但由于依赖用户手动输入值,因此容易出错。因此,我们将创建一些下拉选项,以避免向 Megafilter 端点发送错误的请求。在src/lib/Data下创建另一个名为PoolSortingOptions.ts的文件:
| import type { Sorter } from '$lib/Types/Sorters'; | |
| export const trendingSorters: Sorter = [ | |
| { name: '5m', value: 'm5_trending' }, | |
| { name: '1h', value: 'h1_trending' }, | |
| { name: '6h', value: 'h6_trending' }, | |
| { name: '24h', value: 'h24_trending' } | |
| ]; | |
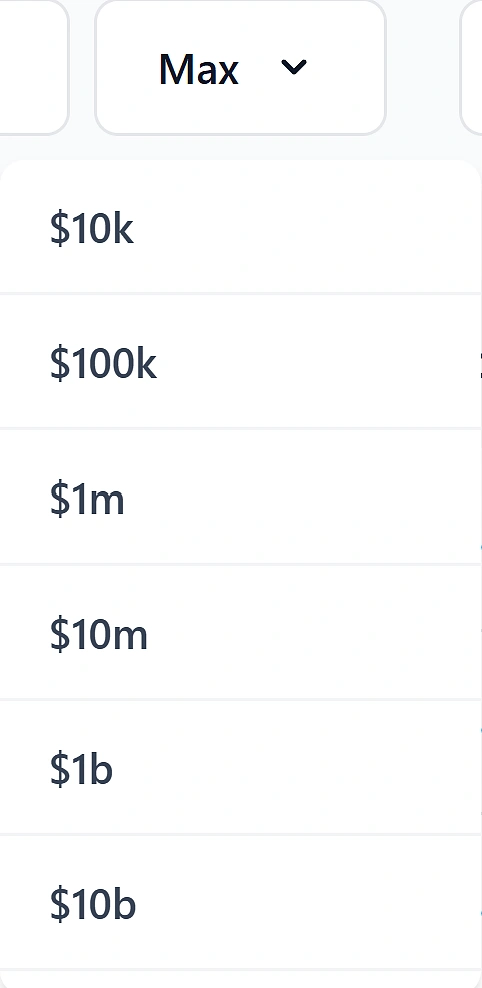
| export const volumeOptions: Sorter = [ | |
| { name: '$10k', value: 10000 }, | |
| { name: '$100k', value: 100000 }, | |
| { name: '$1m', value: 1000000 }, | |
| { name: '$10m', value: 10000000 }, | |
| { name: '$1b', value: 1000000000 }, | |
| { name: '$10b', value: 10000000000 } | |
| ]; | |
| export const txCountOptions: Sorter = [ | |
| { name: '10', value: 10 }, | |
| { name: '100', value: 100 }, | |
| { name: '1000', value: 1000 }, | |
| { name: '10k', value: 10000 }, | |
| { name: '100k', value: 100000 }, | |
| { name: '1m', value: 1000000 } | |
| ]; | |
| export const taxOptions: Sorter = [ | |
| { name: '0%', value: 0 }, | |
| { name: '0.1%', value: 0.1 }, | |
| { name: '0.5%', value: 0.5 }, | |
| { name: '1%', value: 1 }, | |
| { name: '10%', value: 10 } | |
| ]; |
步骤 5:与 API 交互
在生产环境中,您需要确保 CoinGecko API 密钥的安全。实现此目的的一种方法是确保所有发送至 Megafilter 端点的请求均在服务器端处理。在 Svelte 中,可以通过定义+page.server.ts文件为特定路由创建服务器端代码执行。
在src/routes下创建一个名为+page.server.ts 的新文件:
| import CoinGecko from '$lib/Providers/CGProvider'; | |
| import { error } from '@sveltejs/kit'; | |
| import { env } from '$env/dynamic/private'; | |
| import type { PageServerLoad } from './$types'; | |
| import type { Filter } from '$lib/Types/Filter'; | |
| const cg = new CoinGecko(env.CG_API_KEY ?? ''); | |
| export const load: PageServerLoad = async (request) => { | |
| const searchParams = new URL(request.url).searchParams; | |
| const filters: Filter = { | |
| page: searchParams.get('page') ?? '1', | |
| networks: searchParams.get('networks') ?? undefined, | |
| dexes: searchParams.get('dexes') ?? undefined, | |
| sort: searchParams.get('sort') ?? undefined, | |
| fdv_usd_min: searchParams.get('fdv_usd_min') ?? undefined, | |
| fdv_usd_max: searchParams.get('fdv_usd_max') ?? undefined, | |
| h24_volume_usd_min: searchParams.get('h24_volume_usd_min') ?? undefined, | |
| h24_volume_usd_max: searchParams.get('h24_volume_usd_max') ?? undefined, | |
| pool_created_hour_min: searchParams.get('pool_created_hour_min') ?? undefined, | |
| pool_created_hour_max: searchParams.get('pool_created_hour_max') ?? undefined, | |
| tx_count_min: searchParams.get('tx_count_min') ?? undefined, | |
| tx_count_max: searchParams.get('tx_count_max') ?? undefined, | |
| tx_count_duration: searchParams.get('tx_count_duration') ?? undefined, | |
| buys_min: searchParams.get('buys_min') ?? undefined, | |
| buys_max: searchParams.get('buys_max') ?? undefined, | |
| buy_tax_percentage_max: searchParams.get('buy_tax_percentage_max') ?? undefined, | |
| sells_min: searchParams.get('sells_min') ?? undefined, | |
| sells_max: searchParams.get('sells_max') ?? undefined, | |
| checks: searchParams.get('checks') ?? undefined | |
| }; | |
| try { | |
| const response = await cg.getFilteredPools(filters); | |
| if (!response || response.length === 0) { | |
| // If no data is found, return a 404 error | |
| throw error(404, 'Not found'); | |
| } | |
| return { | |
| response | |
| }; | |
| } catch (err) { | |
| console.error(err); | |
| throw error(500, 'Error fetching chart data'); | |
| } | |
| }; |
此服务器端函数使用cg.getFilteredPools()提取查询参数并从 Megafilter 端点获取数据。它还能安全地从.env文件中读取我们的 API 密钥。
步骤 6. 构建 UI
在数据表中呈现响应之前,我们将通过定义排序器和过滤器等组件来开始构建 UI。
建筑组件
在src/lib/Components下首先创建一个名为SorterButtonGroup.svelte的文件。

接下来,让我们在一个名为FilterButton.svelte 的新文件中创建一个名为过滤器按钮。

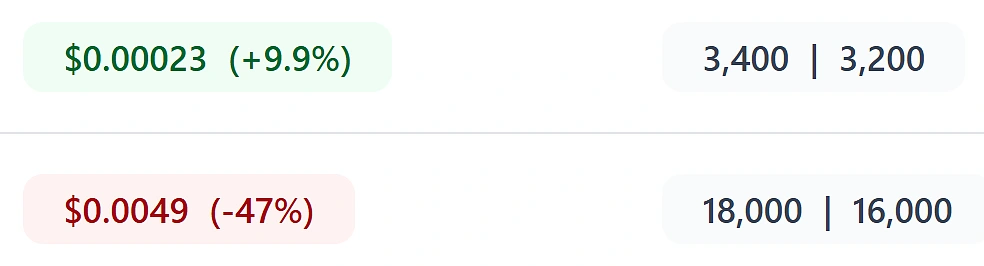
接下来,让我们在PriceTag.svelte 下创建一个价格标签
| <script lang="ts"> | |
| import { Alert } from 'flowbite-svelte'; | |
| interface Props { | |
| primaryNumber: number | null; | |
| primaryNumberType?: 'absolute' | 'relative' | 'raw'; | |
| secondaryNumber?: number | null; | |
| secondaryNumberType?: 'absolute' | 'relative' | 'raw'; | |
| noSecondary?: boolean; | |
| layout?: 'brackets' | 'pipe'; | |
| manualColor?: 'blue' | 'green' | 'red' | 'yellow' | 'dark'; | |
| } | |
| let { | |
| primaryNumber, | |
| primaryNumberType = 'absolute', | |
| secondaryNumber = null, | |
| secondaryNumberType = 'relative', | |
| noSecondary = false, | |
| layout = 'brackets', | |
| manualColor | |
| }: Props = $props(); | |
| let colorSeverity = $derived(() => { | |
| if (manualColor) { | |
| return manualColor; | |
| } | |
| return secondaryNumber && secondaryNumber > 0 ? 'green' : 'red'; | |
| }); | |
| let symbol = $derived(() => | |
| secondaryNumber && secondaryNumberType !== 'raw' && secondaryNumber > 0 ? '+' : '' | |
| ); | |
| const formatNumber = (num: number): string => { | |
| if (num === null || isNaN(num)) return '-'; | |
| return num.toLocaleString(undefined, { maximumSignificantDigits: 2 }); | |
| }; | |
| let formattedPrimaryNumber = $derived(() => { | |
| if (primaryNumber === null) return '-'; | |
| const formatted = formatNumber(Number(primaryNumber)); | |
| if (primaryNumberType === 'raw') { | |
| return formatted; | |
| } | |
| return primaryNumberType === 'absolute' ? `$${formatted}` : `${formatted}%`; | |
| }); | |
| let formattedSecondaryNumber = $derived(() => { | |
| if (!secondaryNumber || noSecondary) return null; | |
| const formatted = formatNumber(Number(secondaryNumber)); | |
| if (secondaryNumberType === 'raw') { | |
| return `${symbol()}${formatted}`; | |
| } | |
| return secondaryNumberType === 'absolute' | |
| ? `${symbol()}$${formatted}` | |
| : `${symbol()}${formatted}%`; | |
| }); | |
| </script> | |
| <Alert color={colorSeverity()} class="max-w-fit py-1"> | |
| <div class="flex items-center justify-center gap-2"> | |
| <span class="font-medium">{formattedPrimaryNumber()}</span> | |
| {#if formattedSecondaryNumber()} | |
| {#if layout === 'pipe'} | |
| | | |
| <span class="font-medium">{formattedSecondaryNumber()}</span> | |
| {:else} | |
| <span class="font-medium">({formattedSecondaryNumber()})</span> | |
| {/if} | |
| {/if} | |
| </div> | |
| </Alert> |
接下来,为了显示适合下拉组件的选项,例如&fdv_usd_min=, 我们可以在名为 DropDownButtonGroup.svelte 的新文件中创建一个下拉按钮组。
构建筛选器选项卡
由于我们有很多过滤器,我们可以使用“过滤器标签”来显示过滤器,而不会使应用程序变得混乱。在同一目录 ( src/lib/Components ) 下创建一个名为FilterTabs.svelte的新文件。
| <script lang="ts"> | |
| import { Tabs, TabItem, MultiSelect, Label, ButtonGroup, Range } from 'flowbite-svelte'; | |
| import { networks } from '$lib/Data/AvailableNetworks.js'; | |
| import FilterButton from '$lib/Components/FilterButton.svelte'; | |
| import SorterButtonGroup from '$lib/Components/SorterButtonGroup.svelte'; | |
| import { | |
| taxOptions, | |
| trendingSorters, | |
| txCountOptions, | |
| volumeOptions | |
| } from '$lib/Data/PoolSortingOptions'; | |
| import DropDownButtonGroup from '$lib/Components/DropDownButtonGroup.svelte'; | |
| let { | |
| selectedNetworks = $bindable(), | |
| checks = $bindable(), | |
| trendingSorter = $bindable(''), | |
| poolCreatedHoursMax = $bindable(), | |
| minFDV = $bindable(), | |
| maxFDV = $bindable(), | |
| minVolume = $bindable(), | |
| maxVolume = $bindable(), | |
| minTxCount = $bindable(), | |
| maxTxCount = $bindable(), | |
| maxBuyTax = $bindable() | |
| } = $props(); | |
| let noHoneyPot = $state(false); | |
| let goodGtScore = $state(false); | |
| let onCoinGecko = $state(false); | |
| let hasSocial = $state(false); | |
| let derivedChecks = $derived(() => { | |
| const items = []; | |
| if (noHoneyPot) items.push('no_honeypot'); | |
| if (goodGtScore) items.push('good_gt_score'); | |
| if (onCoinGecko) items.push('on_coingecko'); | |
| if (hasSocial) items.push('has_social'); | |
| return items.join(','); | |
| }); | |
| $effect(() => { | |
| checks = derivedChecks(); | |
| }); | |
| </script> | |
| <Tabs> | |
| <TabItem open title="Networks"> | |
| <div class="flex w-full items-end gap-6"> | |
| <div> | |
| <Label for="first_name" class="mb-2">Select Networks</Label> | |
| <MultiSelect placeholder="Choose Networks" items={networks} bind:value={selectedNetworks} /> | |
| <p class="text-sm text-gray-500 dark:text-gray-400"> | |
| <b>Tip:</b> | |
| Select one or more networks to filter by. | |
| </p> | |
| </div> | |
| <div class="min-w-[900px]"> | |
| <Label class="mb-2">Sort by Trending</Label> | |
| <SorterButtonGroup options={trendingSorters} bind:selectedOption={trendingSorter} | |
| ></SorterButtonGroup> | |
| <p class="text-sm text-gray-500 dark:text-gray-400"> | |
| <b>Tip:</b> | |
| Select one or more checks. | |
| </p> | |
| </div> | |
| </div> | |
| </TabItem> | |
| <TabItem open title="Pools"> | |
| <div class="flex w-full items-start gap-6"> | |
| <div> | |
| <Label for="first_name" class="mb-2">Checks</Label> | |
| <ButtonGroup class="*:ring-primary-700!"> | |
| <FilterButton bind:isValue={noHoneyPot} label="No Honeypot" /> | |
| <FilterButton bind:isValue={goodGtScore} label="Good GT Score" /> | |
| <FilterButton bind:isValue={onCoinGecko} label="On Coingecko" /> | |
| <FilterButton bind:isValue={hasSocial} label="Has Social" /> | |
| </ButtonGroup> | |
| <p class="text-sm text-gray-500 dark:text-gray-400"> | |
| <b>Tip:</b> | |
| Select one or more checks. | |
| </p> | |
| </div> | |
| <div> | |
| <Label for="first_name" class="mb-2">Created Date</Label> | |
| <Range min="0" max="300" bind:value={poolCreatedHoursMax}></Range> | |
| <p class="text-sm text-gray-500 dark:text-gray-400"> | |
| <b>Tip:</b> | |
| Filter by Pools created in the last {poolCreatedHoursMax} hour(s). | |
| </p> | |
| </div> | |
| </div> | |
| </TabItem> | |
| <TabItem open title="Performance"> | |
| <div class="flex w-full items-end gap-6"> | |
| <div> | |
| <Label for="first_name" class="mb-2">FDV</Label> | |
| <div class="flex items-center gap-2"> | |
| <DropDownButtonGroup name="Min" options={volumeOptions} bind:selectedOption={minFDV} /> | |
| <DropDownButtonGroup name="Max" options={volumeOptions} bind:selectedOption={maxFDV} /> | |
| </div> | |
| </div> | |
| <div> | |
| <Label for="first_name" class="mb-2">Volume</Label> | |
| <div class="flex items-center gap-2"> | |
| <DropDownButtonGroup name="Min" options={volumeOptions} bind:selectedOption={minVolume} /> | |
| <DropDownButtonGroup name="Max" options={volumeOptions} bind:selectedOption={maxVolume} /> | |
| </div> | |
| </div> | |
| <div> | |
| <Label for="first_name" class="mb-2">Tx Count</Label> | |
| <div class="flex items-center gap-2"> | |
| <DropDownButtonGroup | |
| name="Min" | |
| options={txCountOptions} | |
| bind:selectedOption={minTxCount} | |
| /> | |
| <DropDownButtonGroup | |
| name="Max" | |
| options={txCountOptions} | |
| bind:selectedOption={maxTxCount} | |
| /> | |
| </div> | |
| </div> | |
| <div> | |
| <Label for="first_name" class="mb-2">Max Buy Tax</Label> | |
| <div class="flex items-center gap-2"> | |
| <SorterButtonGroup options={taxOptions} bind:selectedOption={maxBuyTax} /> | |
| </div> | |
| </div> | |
| </div> | |
| </TabItem> | |
| </Tabs> |
构建数据表
这里我们定义了 Megafilter 的响应在页面上的呈现方式。我们选择了分页表,这样导航更方便,也更节省空间。我们可以先创建一个名为DataTable.svelte的新文件。
| <script lang="ts"> | |
| import { Tabs, TabItem, MultiSelect, Label, ButtonGroup, Range } from 'flowbite-svelte'; | |
| import { networks } from '$lib/Data/AvailableNetworks.js'; | |
| import FilterButton from '$lib/Components/FilterButton.svelte'; | |
| import SorterButtonGroup from '$lib/Components/SorterButtonGroup.svelte'; | |
| import { | |
| taxOptions, | |
| trendingSorters, | |
| txCountOptions, | |
| volumeOptions | |
| } from '$lib/Data/PoolSortingOptions'; | |
| import DropDownButtonGroup from '$lib/Components/DropDownButtonGroup.svelte'; | |
| let { | |
| selectedNetworks = $bindable(), | |
| checks = $bindable(), | |
| trendingSorter = $bindable(''), | |
| poolCreatedHoursMax = $bindable(), | |
| minFDV = $bindable(), | |
| maxFDV = $bindable(), | |
| minVolume = $bindable(), | |
| maxVolume = $bindable(), | |
| minTxCount = $bindable(), | |
| maxTxCount = $bindable(), | |
| maxBuyTax = $bindable() | |
| } = $props(); | |
| let noHoneyPot = $state(false); | |
| let goodGtScore = $state(false); | |
| let onCoinGecko = $state(false); | |
| let hasSocial = $state(false); | |
| let derivedChecks = $derived(() => { | |
| const items = []; | |
| if (noHoneyPot) items.push('no_honeypot'); | |
| if (goodGtScore) items.push('good_gt_score'); | |
| if (onCoinGecko) items.push('on_coingecko'); | |
| if (hasSocial) items.push('has_social'); | |
| return items.join(','); | |
| }); | |
| $effect(() => { | |
| checks = derivedChecks(); | |
| }); | |
| </script> | |
| <Tabs> | |
| <TabItem open title="Networks"> | |
| <div class="flex w-full items-end gap-6"> | |
| <div> | |
| <Label for="first_name" class="mb-2">Select Networks</Label> | |
| <MultiSelect placeholder="Choose Networks" items={networks} bind:value={selectedNetworks} /> | |
| <p class="text-sm text-gray-500 dark:text-gray-400"> | |
| <b>Tip:</b> | |
| Select one or more networks to filter by. | |
| </p> | |
| </div> | |
| <div class="min-w-[900px]"> | |
| <Label class="mb-2">Sort by Trending</Label> | |
| <SorterButtonGroup options={trendingSorters} bind:selectedOption={trendingSorter} | |
| ></SorterButtonGroup> | |
| <p class="text-sm text-gray-500 dark:text-gray-400"> | |
| <b>Tip:</b> | |
| Select one or more checks. | |
| </p> | |
| </div> | |
| </div> | |
| </TabItem> | |
| <TabItem open title="Pools"> | |
| <div class="flex w-full items-start gap-6"> | |
| <div> | |
| <Label for="first_name" class="mb-2">Checks</Label> | |
| <ButtonGroup class="*:ring-primary-700!"> | |
| <FilterButton bind:isValue={noHoneyPot} label="No Honeypot" /> | |
| <FilterButton bind:isValue={goodGtScore} label="Good GT Score" /> | |
| <FilterButton bind:isValue={onCoinGecko} label="On Coingecko" /> | |
| <FilterButton bind:isValue={hasSocial} label="Has Social" /> | |
| </ButtonGroup> | |
| <p class="text-sm text-gray-500 dark:text-gray-400"> | |
| <b>Tip:</b> | |
| Select one or more checks. | |
| </p> | |
| </div> | |
| <div> | |
| <Label for="first_name" class="mb-2">Created Date</Label> | |
| <Range min="0" max="300" bind:value={poolCreatedHoursMax}></Range> | |
| <p class="text-sm text-gray-500 dark:text-gray-400"> | |
| <b>Tip:</b> | |
| Filter by Pools created in the last {poolCreatedHoursMax} hour(s). | |
| </p> | |
| </div> | |
| </div> | |
| </TabItem> | |
| <TabItem open title="Performance"> | |
| <div class="flex w-full items-end gap-6"> | |
| <div> | |
| <Label for="first_name" class="mb-2">FDV</Label> | |
| <div class="flex items-center gap-2"> | |
| <DropDownButtonGroup name="Min" options={volumeOptions} bind:selectedOption={minFDV} /> | |
| <DropDownButtonGroup name="Max" options={volumeOptions} bind:selectedOption={maxFDV} /> | |
| </div> | |
| </div> | |
| <div> | |
| <Label for="first_name" class="mb-2">Volume</Label> | |
| <div class="flex items-center gap-2"> | |
| <DropDownButtonGroup name="Min" options={volumeOptions} bind:selectedOption={minVolume} /> | |
| <DropDownButtonGroup name="Max" options={volumeOptions} bind:selectedOption={maxVolume} /> | |
| </div> | |
| </div> | |
| <div> | |
| <Label for="first_name" class="mb-2">Tx Count</Label> | |
| <div class="flex items-center gap-2"> | |
| <DropDownButtonGroup | |
| name="Min" | |
| options={txCountOptions} | |
| bind:selectedOption={minTxCount} | |
| /> | |
| <DropDownButtonGroup | |
| name="Max" | |
| options={txCountOptions} | |
| bind:selectedOption={maxTxCount} | |
| /> | |
| </div> | |
| </div> | |
| <div> | |
| <Label for="first_name" class="mb-2">Max Buy Tax</Label> | |
| <div class="flex items-center gap-2"> | |
| <SorterButtonGroup options={taxOptions} bind:selectedOption={maxBuyTax} /> | |
| </div> | |
| </div> | |
| </div> | |
| </TabItem> | |
| </Tabs> |
步骤 7. 整合
现在,我们已经拥有了使用 Megafilter 过滤链上矿池所需的所有数据和元素。我们需要做的就是为服务器数据定义一个变量,并将其传递给相应的组件。
将src/routes/+page.svelte中的内容替换为以下内容:
| <script lang="ts"> | |
| import { goto } from '$app/navigation'; | |
| import { Pagination } from 'flowbite-svelte'; | |
| import DataTable from '$lib/Components/DataTable.svelte'; | |
| import FilterTabs from '$lib/Components/FilterTabs.svelte'; | |
| let data = $props(); | |
| let currentPage = $state(1); | |
| let selectedNetworks = $state([]); | |
| let checks = $state(''); | |
| let trendingSorter = $state(''); | |
| let poolCreatedHoursMax = $state(undefined); | |
| let minFDV = $state(undefined); | |
| let maxFDV = $state(undefined); | |
| let minVolume = $state(undefined); | |
| let maxVolume = $state(undefined); | |
| let minTxCount = $state(undefined); | |
| let maxTxCount = $state(undefined); | |
| let maxBuyTax = $state(undefined); | |
| let networkParams = $derived(() => selectedNetworks.join(',')); | |
| const previous = () => { | |
| if (currentPage == 1) return; | |
| currentPage -= 1; | |
| }; | |
| const next = () => { | |
| currentPage += 1; | |
| }; | |
| $effect(() => { | |
| updateQueryParams(); | |
| }); | |
| const updateQueryParams = () => { | |
| const url = new URL(window.location.href); | |
| const queryParams: Record<string, string | undefined> = { | |
| page: currentPage.toString(), | |
| networks: networkParams(), | |
| checks, | |
| sort: trendingSorter, | |
| pool_created_hour_max: poolCreatedHoursMax, | |
| fdv_usd_min: minFDV, | |
| fdv_usd_max: maxFDV, | |
| h24_volume_usd_min: minVolume, | |
| h24_volume_usd_max: maxVolume, | |
| tx_count_min: minTxCount, | |
| tx_count_max: maxTxCount, | |
| buy_tax_percentage_max: maxBuyTax | |
| }; | |
| Object.entries(queryParams).forEach(([key, value]) => { | |
| if (value) { | |
| url.searchParams.set(key, value); | |
| } else { | |
| url.searchParams.delete(key); | |
| } | |
| }); | |
| goto(url.toString(), { replaceState: true }); | |
| }; | |
| </script> | |
| <div class="flex w-full flex-col gap-8 p-20"> | |
| <h2 class="text-xl font-semibold">Pool Finder</h2> | |
| <p>Welcome to Pool Finder. Use this tool identify new and promising liquidity pools.</p> | |
| <div> | |
| <FilterTabs | |
| bind:selectedNetworks | |
| bind:checks | |
| bind:trendingSorter | |
| bind:poolCreatedHoursMax | |
| bind:minFDV | |
| bind:maxFDV | |
| bind:minVolume | |
| bind:maxVolume | |
| bind:minTxCount | |
| bind:maxTxCount | |
| bind:maxBuyTax | |
| ></FilterTabs> | |
| </div> | |
| <DataTable tableData={data} /> | |
| <div class="flex w-full items-center justify-center"> | |
| <Pagination | |
| pages={[]} | |
| large | |
| on:previous={previous} | |
| on:next={next} | |
| on:change={updateQueryParams} | |
| > | |
| <span slot="prev">Prev</span> | |
| </Pagination> | |
| </div> | |
| </div> |
要启动您的 Web 应用程序并与之交互,请运行 npm run dev 并导航到http://localhost:5173(或下一个可用端口)。
最终结果应该看起来像这样:

与过滤器交互会立即更新表格数据和查询字符串。点击某一行即可展开该行,并提供有关该特定流动性池的更多详细信息。
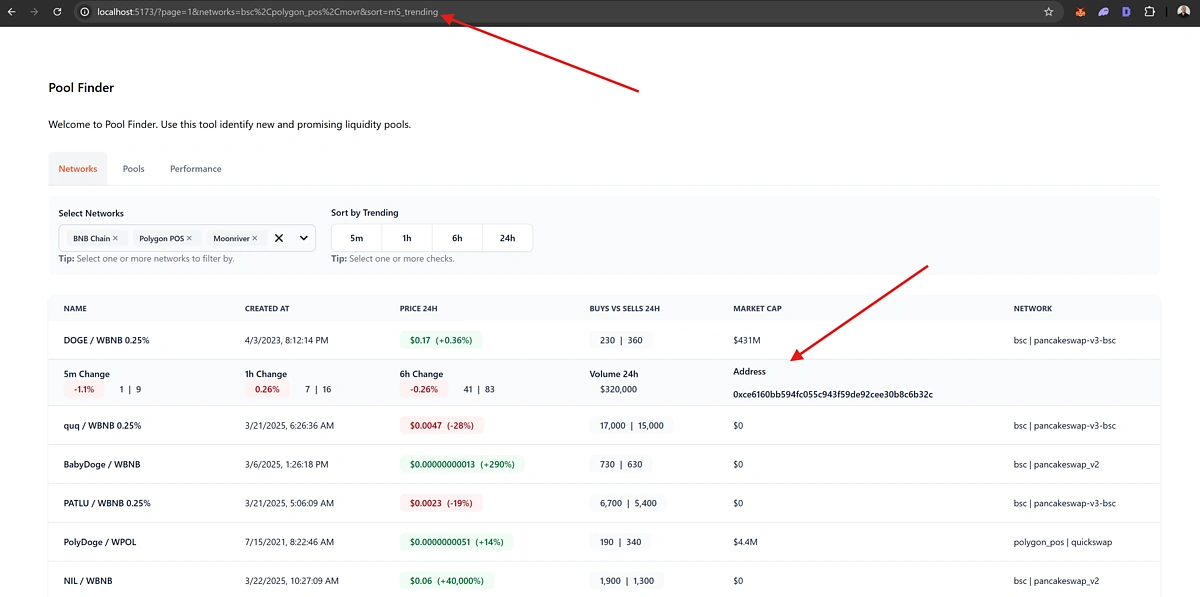
使用标签页浏览我们定义的各种筛选器和排序选项,并使用分页按钮浏览表格结果。您还可以通过创建更多筛选器选项来扩展此界面。请参阅“筛选器”类型,了解所有可用的筛选选项。